User Interface for running and configuring eXport+
User Interface provides a visual way to configure the export process. There are several tabs in the ribbon to configure options, Files And Folders group for the input files and folders and Export Result group for the report, summary and log
Input And Results
This tab allows to configure input to process and inspect the results
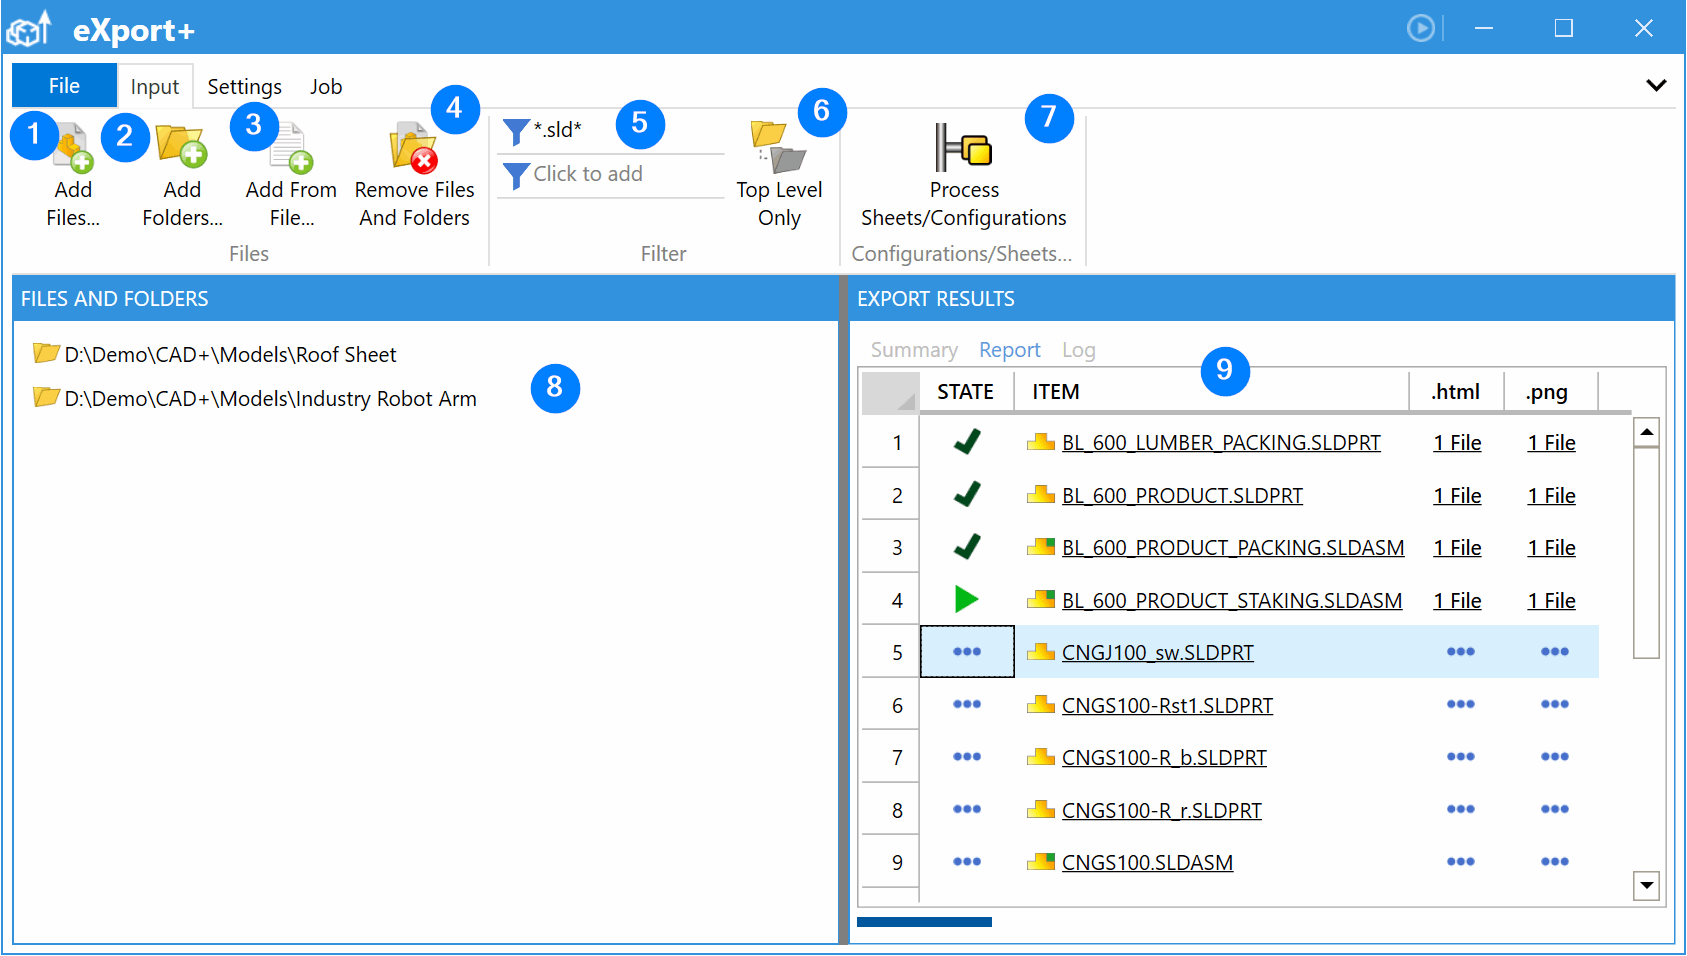
- Browsing the files to add to the exporting process
- Browsing the folders to add to the exporting process
- Browse for the text file with the list of files and folders to process
- Remove selected files and folders from the scope
- Filter for files when processing folder. You can use a * wildcard, e.g. *.sld* will filter all SOLIDWORKS files (.sldprt, .slddrw and .sldasm) and exclude all other files types.
- Process only top level files in the specified folder
- Activate and export individual configurations
- Input files and folders scope. Use Add Files... (1) and Add Folders... (2) buttons to add new files and folders. Press del button on keyboard to remove the selected files or folders from the list. Alternatively drag-n-drop files and folders directly to the list.
- Export results page
- Summary generic information about the job
- Report detailed report of each item and the result
- Log detailed messages log
Settings

- Version of eDrawings to run
- Output folder to store the results. Path can be pasted directly to this box or Browse... (3) button can be used instead.
- Browsing the output folder to store the results
- Output files in the same directory as original files
- List of formats to output. Multiple formats can be selected. Use Expression Box to configure flexible naming
- Allow overwriting the output files
- Processing timeout in seconds of exporting a single file to single output format (e.g. exporting Part1.sldprt to Part1.html)
- Allows exporting process to continue if any of the export operations fail (for example one of the files in the queue is broken). If this option is not checked, export process will be terminated once the error appears.
Job
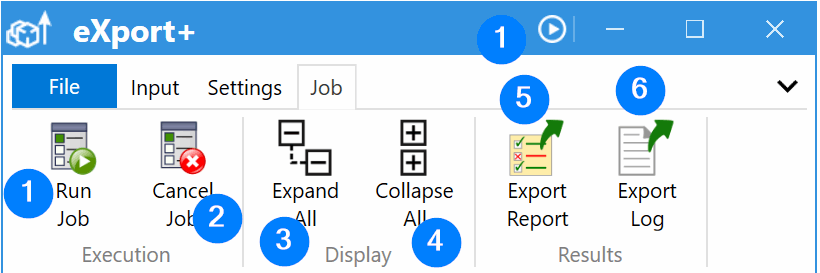
- Button to start exporting process. Export button enables when all required inputs are specified (input folders and files and export formats)
- Cancel the current job
- Expand all items (if item has configuration)
- Collapse all items (if item has configuration)
- Export report to the external file (e.g. Excel)
- Export log to the external file (e.g. Text)