Configuring macro buttons in Toolbar+ add-in for SOLIDWORKS
Adding Macro Buttons And Toolbars
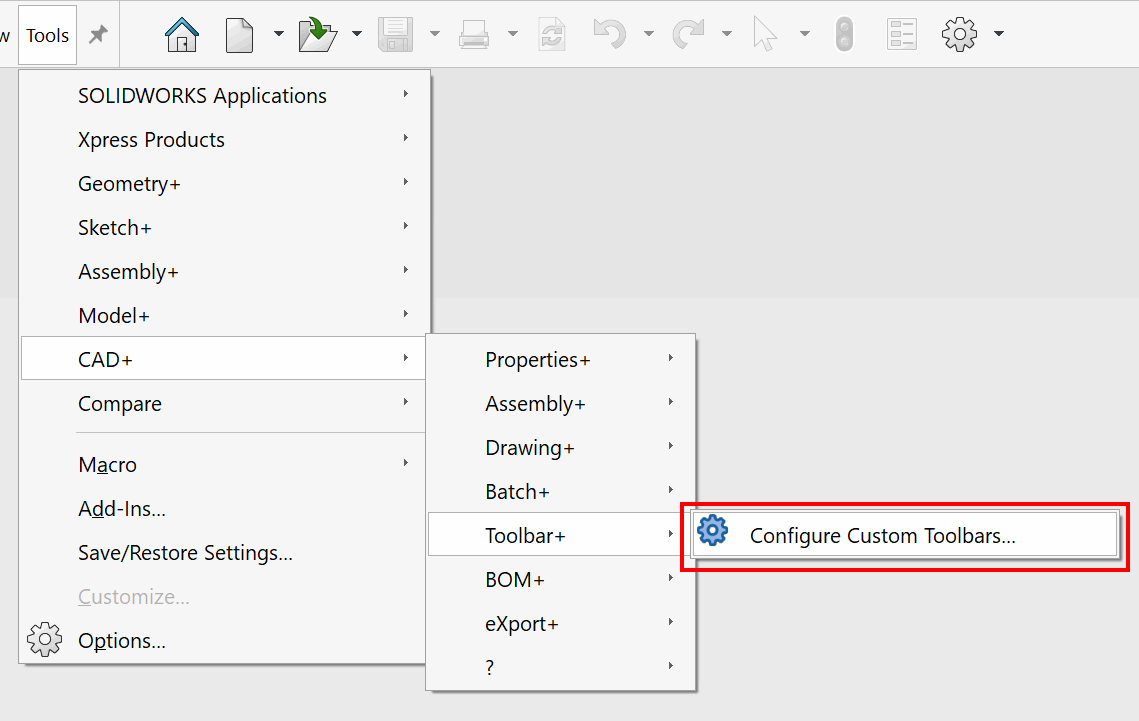
Macro buttons can be configured by clicking on 'Configure Custom Toolbars...' command in Toolbar+ menu in SOLIDWORKS
The configuration dialog is displayed, where existing toolbars and buttons can be modified and new ones can be added.
Click the green plus (+) button to add a new toolbar or macro button.
Configure the parameters as shown below:
Configuring Macro Buttons In Toolbar
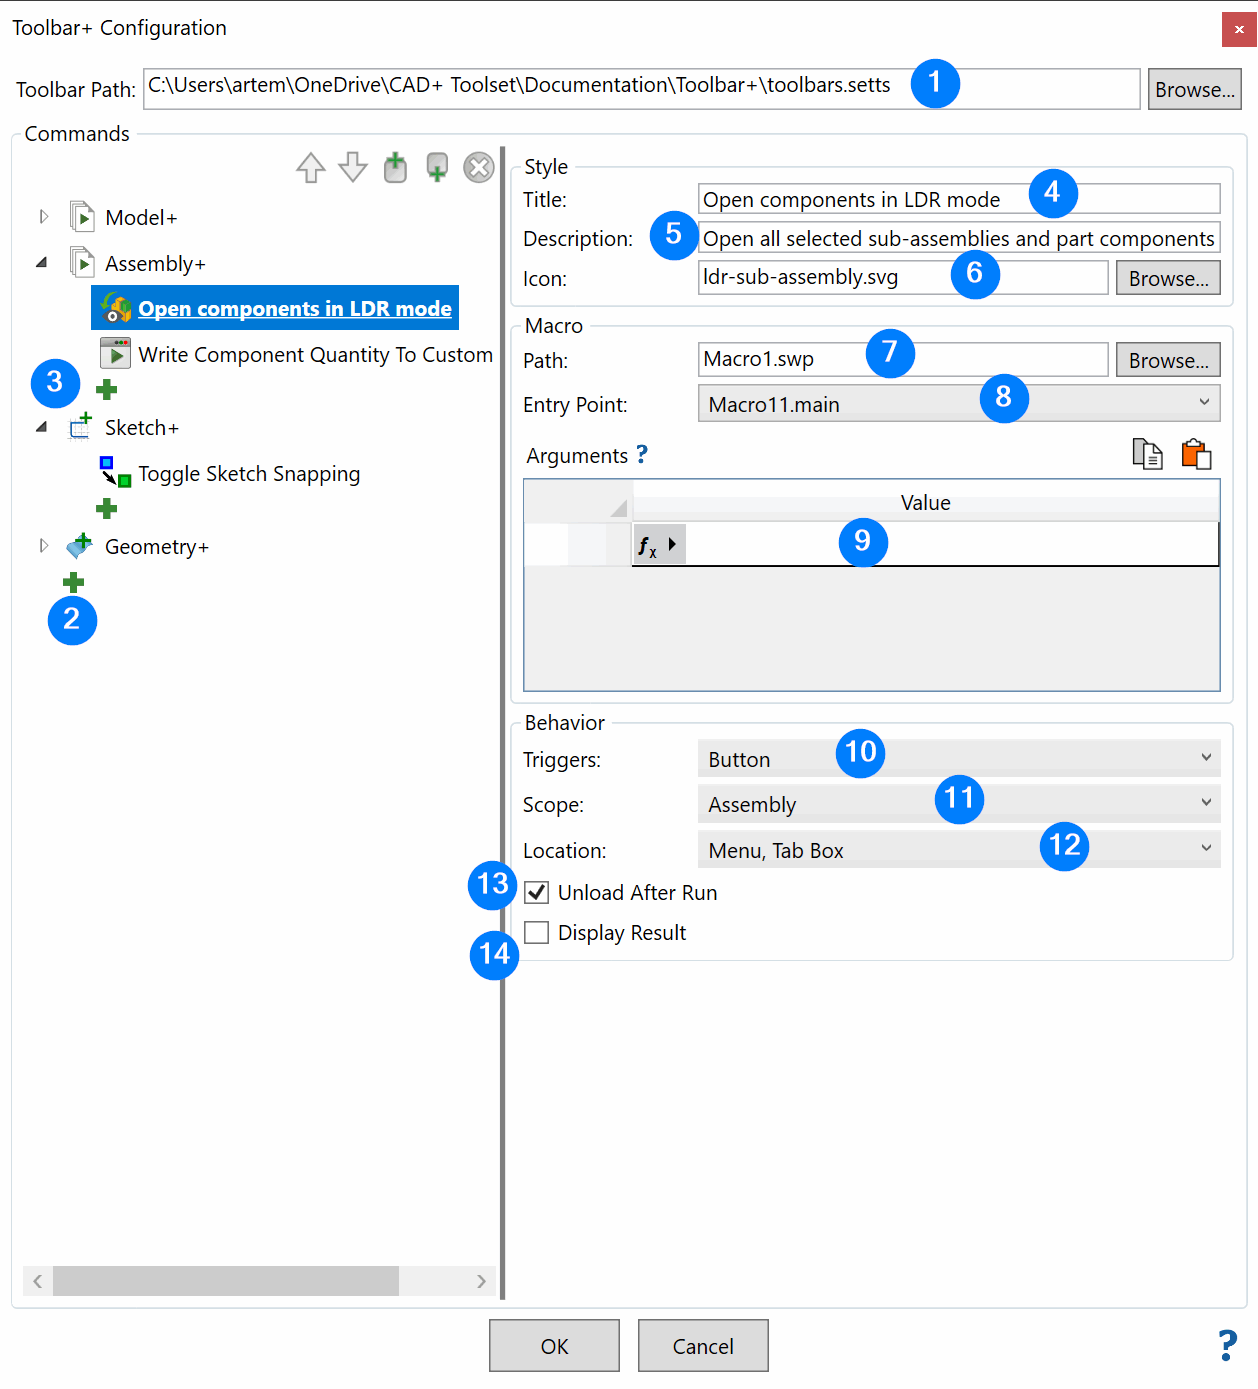
- Path to toolbar file. This setting is stored locally to the user. UNC path is supported if required to configure a shared toolbar
- Add new toolbar
- Add new macro button in toolbar
- Title of the macro button. It is displayed as a bold header in the tooltip when mouse hovers a button in SOLIDWORKS toolbar
- Description of the macro button. It is displayed as a sub-header in the tooltip and in the SOLIDWORKS task bar in the bottom right corner when mouse hovers a button in SOLIDWORKS toolbar
- Path to icon of the macro button. Raster image files - optimal size is between 16x16 and 120x120 in PNG format, however image will be automatically scaled and aligned which allows support for any size (including different width and height). Transparency is supported. Scalable Vector Graphics images in SVG (recommended option). Provides the best quality for icons as it will be scaled without quality loss depending on the resolution of the screen and button sizes.
- Full path to macro to run
- Macro entry point. This is the subroutine that should run first when executing the macro. It is a parameterless subroutine (usually named main). Toolbar+ will try to find the most suitable subroutine automatically
- Macro custom arguments. See the Macro+ article for more information
- Triggers. Macro trigger options. See the triggers article for more information
- Command scope. Identifies the scope (part, assembly, drawing, no documents) where the macro can be run. The macro will be disabled in the environments that are not selected
- Command location. Identifies where command should be added (menu, toolbar, tab box). This option is only available for Button and Toggle Button triggers
- Unload After Run. If this option is checked, the macro is automatically unloaded after it runs. This is useful when the macro is shared across different users, as the macro is released immediately, making it possible to replace it with a new version. This option cannot be used if the macro displays a User Form, because the form would be closed as soon as the macro is unloaded. Uncheck this option if the macro uses a User Form or any other popup window.
- If this option is checked, custom results from Macro+ macros are displayed in a popup
You can use a relative path for the icon and macro path options. Use ..\ to indicate a path relative to the toolbar.setts file. This is particularly useful when toolbar settings are moved between computers or set up in a shared environment
Configuring Toolbar
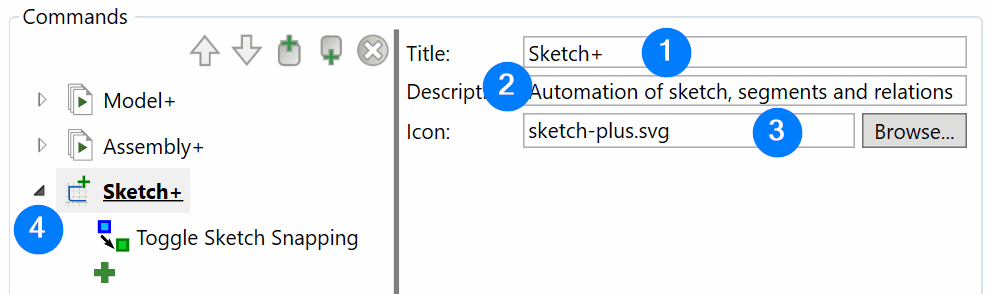
- Toolbar title to be displayed in the SOLIDWORKS toolbars manager
- Toolbar tooltip
- Toolbar icon
- Preview of toolbar icon (default icon)
Modifying Commands
Select macro buttons and toolbars to load and edit the parameters. Use context menu or commands box to reorganize the commands as shown below.
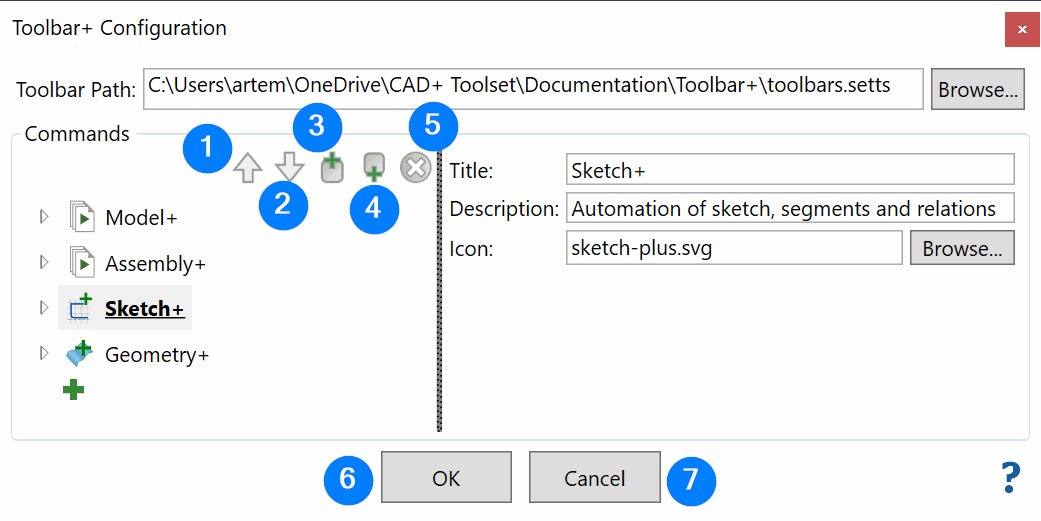
- Move selected macro button to the left or move toolbar up
- Move selected macro button to the right or move toolbar down
- Add new macro button left to the selected macro button or add new toolbar above the selected toolbar
- Add new macro button right to the selected macro button or add new toolbar below the selected toolbar
- Remove selected macro button or toolbar
- Save changes and close dialog
- Close dialog without saving changes
Saving Changes
If the toolbar configuration has changed, the following message is displayed and SOLIDWORKS needs to be restarted for the settings to take effect (unless the toolbar is read-only in a multi-user environment).
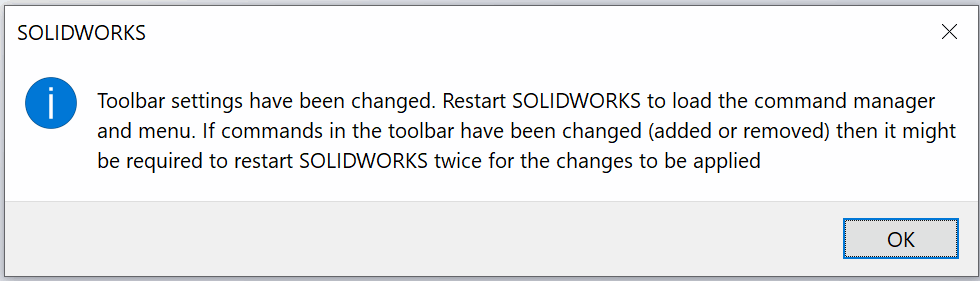
Toolbar+ attempts to preserve the IDs of the buttons to keep the customization. However, SOLIDWORKS might need to clear the IDs after the toolbar has been changed. When the toolbar is changed and commands are added or removed, you might need to restart SOLIDWORKS twice for the commands to display correctly within the toolbar.
Accessing Macro Buttons
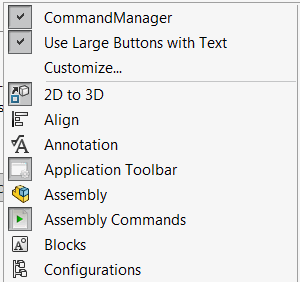
Toolbars are available in the SOLIDWORKS toolbars list:
and in the SOLIDWORKS menu.
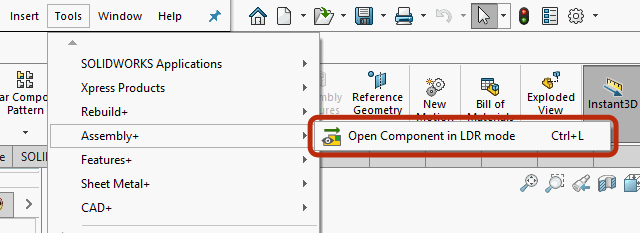
If a command is added to the Tab Box (ribbon), all toolbars are added under the Toolbar+ command tab box, with individual toolbars separated.
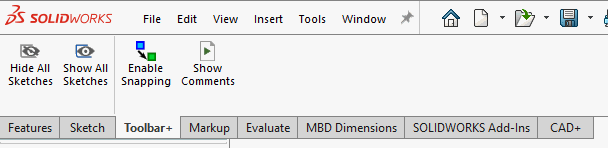
Toolbars can be reorganized and placed into the SOLIDWORKS command manager area. Visit Customization page for additional customization options for the toolbars and commands.